ReactJS Hooks - useEffect

ReactJS Hooks
Hello everyone, continuing the series of articles about Hooks, in this article I'll talk about useEffect.
If you want to learn a bit more about Hooks, you can read this content here:
The useEffect (effect hook) is a Hook for listening to changes made in a component. With it we can interact with some React lifecycle functions, just as it was done using classes.
Those with React experience using classes may be familiar with some methods that were used to control the component, such as:
- componentDidMount
- componentWillUnmount
- componentDidUpdate
These methods can also be used with useEffect.
But if this is your first experience or you started using React already with Hooks without going through classes, don't worry — I'll explain how useEffect will apply effects to the component and then I'll just demonstrate with a class, but understanding the latter is not mandatory.
But first, let me demonstrate a bit about how the React lifecycle works.
We can divide it into 4 stages:
- Initialization
- Mounting
- Updating
- Unmounting

During initialization the component receives its properties and initializes the initial state — that is, if both are provided.
In the Mounting stage there are two steps: render and componentDidMount. Although the image shows the componentWillMount method, it is no longer used because it was deprecated in version 16.3.0 and will be removed — so depending on the version you're using it may no longer exist. The same applies to componentWillRecieveProps and componentWillUpdate.
I kept them in the image for educational purposes but these should no longer be used.
Next we have the Updating stage of the component which is triggered via props or changes in the component's state. This stage runs in a loop (I'll explain better below).
And finally we have the Unmounting stage which is controlled by componentWillUnmount.
Notice that at each stage a form of component control is exposed that can use its methods or not.
When creating and updating a component, React will go through each stage of its lifecycle, and in this way we can use its methods to have better control over what will be done in the component.
It's important to understand how the lifecycle works as a whole — to know what happens at each stage and, if necessary, use a method for better performance. But I wouldn't recommend doing a deep study of everything that's happening. I like to say the ideal approach is an 80/20 understanding: where 20% is a general knowledge of how each stage works and 80% is seeking a more refined understanding and application, leaving the latter to be applied according to the need/problem you'll be solving.
I say this to avoid you going out wanting to use all methods unnecessarily. Always try to keep your application as simple as possible and apply resources only when needed.
How useEffect works
useEffect has the following structure:
// This way we can simulate componentDidMount and componentDidUpdate
useEffect(() => {
  document.title = `Tautorn Tech`;
})
In the format above it will execute as soon as the component is rendered, like a constructor, and also when the component is updated.
Therefore, useEffect is always executed on every component render (mounting) and update.
Effect without cleanup
This format is called an effect without cleanup — which is when the Hook can execute it and then will no longer listen to any changes/effects.
Remember that the change is applied when the component mounts and when it undergoes some change, using useState, for example.
Now it's possible to listen (a term I like to use) to the component so we can make some change. We can do it with the following structure:
// This way we can execute componentDidUpdate
useEffect(() => {
  document.title = siteName;
  // Whenever siteName (any variable) changes, execute this hook again and change the page title.
}, [siteName])
Notice that it's possible to pass arguments (line 5) to useEffect to tell it when it should make a change.
This way the component is listening to this variable and applying the effect inside the useEffect. Simple, right?!
You can pass as many arguments as needed, but caution is required because it's very easy to fall into a loop if the effects are specified incorrectly, as in the scenario below:
// This way we can simulate componentDidMount and componentDidUpdate

const [name, setName] = useState('tautorn')

useEffect(() => {
  setName('bruno')
}, [name])
In the example above, every time the name variable changes, an effect will be applied where it will call the setState method to update the value of name again. This causes the component to enter a loop until a memory overflow occurs in the application.
Another lifecycle method that can be executed using useEffect is componentWillUnmount, which is the component unmounting stage.
Effects with Cleanup
In this stage it's possible to perform the effect with cleanup, where we can stop a method to prevent a memory overflow, for example.
The most basic example (yes, you'll find this example in 11 out of 10 searches you do) is
cleaning up a function using setInterval.
export default function Hello() {
  useEffect(() => {
    let interval = null;

    interval = setInterval(() => {
      console.log("Yupiiii")
    }, 1000);

    // Here I'm executing componentWillUnmount
    return () => clearInterval(interval);
  }, []);
}
In the example above, the Hello component mounted and useEffect was executed (I didn't pass arguments to useEffect, so it will only run once) firing the setInterval to log a message in the browser console every 1 second. But notice that on line 10 I added a return with a clearInterval (a method used to stop the setInterval from executing). This way, as soon as the component is unmounted, the return will be executed triggering clearInterval. Otherwise, setInterval could keep running indefinitely until a memory overflow occurs, or just run unnecessarily and still consume memory without need.
A component is unmounted when we navigate to another page, for example, where something that existed will no longer be present. Remember that React works in a declarative way (exists, doesn't exist).
Practical Example
Now I'll present the creation of a solar energy capture simulation going through the React lifecycle using useEffect.
The current version I'm using to create these examples is 17.0.2
Regardless of the correct cycle, region or timezone, let's imagine that the Sun will always rise and set from 06:00 to 18:00, maintaining a daily cycle of 12 hours.
I apologize to anyone who understands solar energy capture — I generated random values and forms for educational purposes only; my intent is just to demonstrate how React works.
The code will look like this:
import { ReactComponent as Sun } from "./sun.svg";
import { ReactComponent as House } from "./house.svg";

export default function SolarSystem() {

  return (
    <div stlye={{ display: "flex" }}>
      <h1>Solar Energy Generation </h1>
      <Sun height="100px" />
      <div>
        <House height="100px" />
      </div>
    </div>
  );
}
Final result:

But now I want to create the effect of the sun rising and setting according to the schedule I set. For that I'll create a Hook using useEffect.
import { useEffect, useState } from "react";
import { ReactComponent as Sun } from "./sun.svg";
import { ReactComponent as House } from "./house.svg";
import { ReactComponent as Moon } from "./moon.svg";

export default function SolarSystem() {
  const [hour, setHour] = useState(6);
  const [isActive, setIsActive] = useState(false);

  useEffect(() => {
    let interval = null;

    interval = setInterval(() => {
      setHour(hour + 1);
    }, 1000);

    if (hour > 23) {
      setHour(0);
    }

    return () => clearInterval(interval);
  }, [hour]);

  return (
    <div>
      <h1>Solar Energy Generation </h1>
      <h2>Time of day: {hour}h </h2>
      {isActive ? <Sun height="100px" /> : <Moon height="100px" />}
      <div>
        <House height="100px" />
      </div>
    </div>
  );
}
Final result:
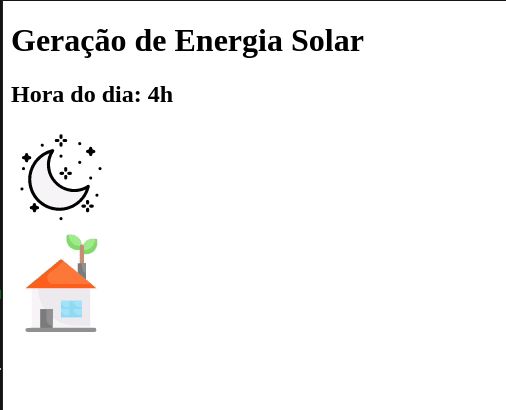
With that I created a simulation of the Sun rising and setting. Now I'll explain each line of the useEffect and show which lifecycle stages were executed.
Lines 7 and 8 use the useState hook to create the component state. They will trigger componentDidMount, which is the component mounting stage.
Initialization is the receiving of properties and state. Here a component could be created to receive properties
<SolarSystem kwh="1.57" />and use them.
Lines 11 through 19: I created a timer to simulate updating the time of day, displaying the value on line 27. This timer runs in a loop incrementing 1h each time, thereby triggering componentDidUpdate when executing setHour on lines 14 and 18.
Here we see the updating stage of the application.
Finally, I executed the unmounting stage (componentWillUnmount) so that once the component no longer exists, the setInterval is stopped. This was possible thanks to the return on line 21 (cleanup effect).
Simple, right?! With that it's possible to go through all lifecycle stages by combining some React Hooks.
There are several others but I won't present them now.
Using multiple effects
It's also possible to create multiple useEffect inside the component, just as it was done with useState. In fact, you can do this with any Hook.
To demonstrate this example I'll improve the solar system component — I'll start capturing the energy generated during the period when the sun is available. It will look like this:
import { useEffect, useState } from "react";
import { ReactComponent as Sun } from "./sun.svg";
import { ReactComponent as House } from "./house.svg";
import { ReactComponent as Moon } from "./moon.svg";

const KWH = 1.57;

export default function SolarSystem() {
  const [hour, setHour] = useState(6);
  const [isActive, setIsActive] = useState(false);
  const [energy, setEnergy] = useState(0);

  useEffect(() => {
    let interval = null;

    interval = setInterval(() => {
      setHour(hour + 1);
    }, 1000);

    if (hour > 23) {
      setHour(0);
    }

    return () => clearInterval(interval);
  }, [hour]);

  useEffect(() => {
    if (hour > 5 && hour < 19) {
      setIsActive(true);
      setEnergy(energy + KWH);
    } else {
      setIsActive(false);
    }

    if (hour === 24) {
      setEnergy(0);
    }
  }, [hour]);

  return (
    <div>
      <h1>Solar Energy Generation </h1>
      <h2>Time of day: {hour}h </h2>
      {isActive ? <Sun height="100px" /> : <Moon height="100px" />}
      <div>
        <House height="100px" />
        <p>Amount of energy generated today: {energy.toFixed(2)} kw/h</p>
      </div>
    </div>
  );
}
The functionality of this application can be found at: Code Sandbox.
I added some rules so that when the sun is available, the energy value generated per hour will be stored in a variable and then displayed in the browser.
  useEffect(() => {
    if (hour > 5 && hour < 19) {
      setIsActive(true);
      setEnergy(energy + KWH);
    } else {
      setIsActive(false);
    }

    if (hour === 24) {
      setEnergy(0);
    }
  }, [hour]);
I noticed that the argument I provided is the same as the first useEffect, but I created this separation to better organize the code and have easier control of the application.
=D
Simpler than a Jeep dashboard.
That's what I wanted to present about useEffect for today. Of course there are infinitely more things that can be done, as well as things that should NOT be done — but I'll leave that for another time.
See you later :)
To learn about useState
I'll soon update this page with useContext examples
References:
ReactJS - Hooks Reference ReactJS - Hooks Effect Awesome React Hooks Enmascript